403 Forbidden
ERR_WEB_NGX_403

If you’re planning a kitchen renovation, fitting out a new bathroom, or simply looking to update tired lighting throughout your home, you’ve almost certainly come across downlights. These discreet ceiling fixtures have become the go-to choice for modern interiors across the UK, replacing bulky pendants and dated spotlights in everything from compact hallways to open-plan living spaces.
But with so many options available—recessed, surface mounted, fire-rated, IP-rated, integrated, dimmable—it’s easy to feel overwhelmed. This guide cuts through the jargon and explains exactly what downlights are, how they work, and how to choose the right ones for your space.
Downlights are lighting fixtures designed to be installed into or onto a ceiling, directing a beam of light in a downward direction to illuminate the space below. Most modern downlights use LED technology as their light source, making them highly energy efficient with a significantly longer lifespan than older halogen or incandescent bulbs.
These versatile lighting solutions have become increasingly popular in UK homes and commercial spaces alike. You’ll find them in kitchens, bathrooms, living rooms, offices, retail stores, and corridors—essentially anywhere a clean, uncluttered ceiling is desired.
Key points to remember:
Downlights sit flush or nearly flush with the ceiling, creating a sleek, modern look
Most downlights today are LED-based, consuming far less energy than older technologies
They provide ambient lighting across a room or can be positioned for task lighting and accent lighting
The main difference between downlights and spotlights is that downlights typically point straight down and blend into the ceiling, while spotlights offer more directional lighting with visible, adjustable heads
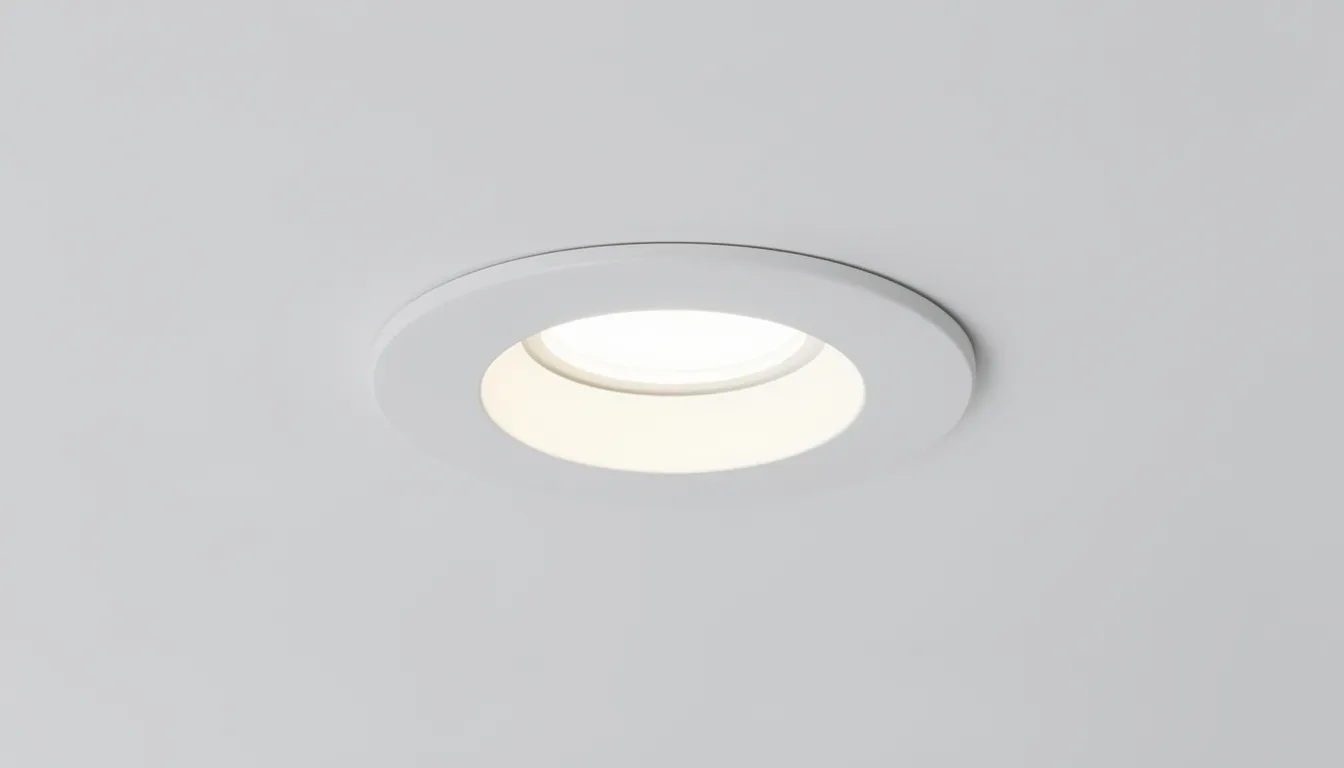
Most downlights sit partly or fully inside the ceiling void, with only the trim (also called the bezel) and the light source visible from below. This recessed installation method keeps the ceiling clean and allows the light fitting to become almost invisible when switched off.
From the room below, you’ll typically see a circular or square trim that frames the visible aperture. Behind this sits the LED module or lamp, along with a reflector that helps direct light efficiently. Some designs include a diffuser lens to soften the output and reduce glare.
Understanding the main components:
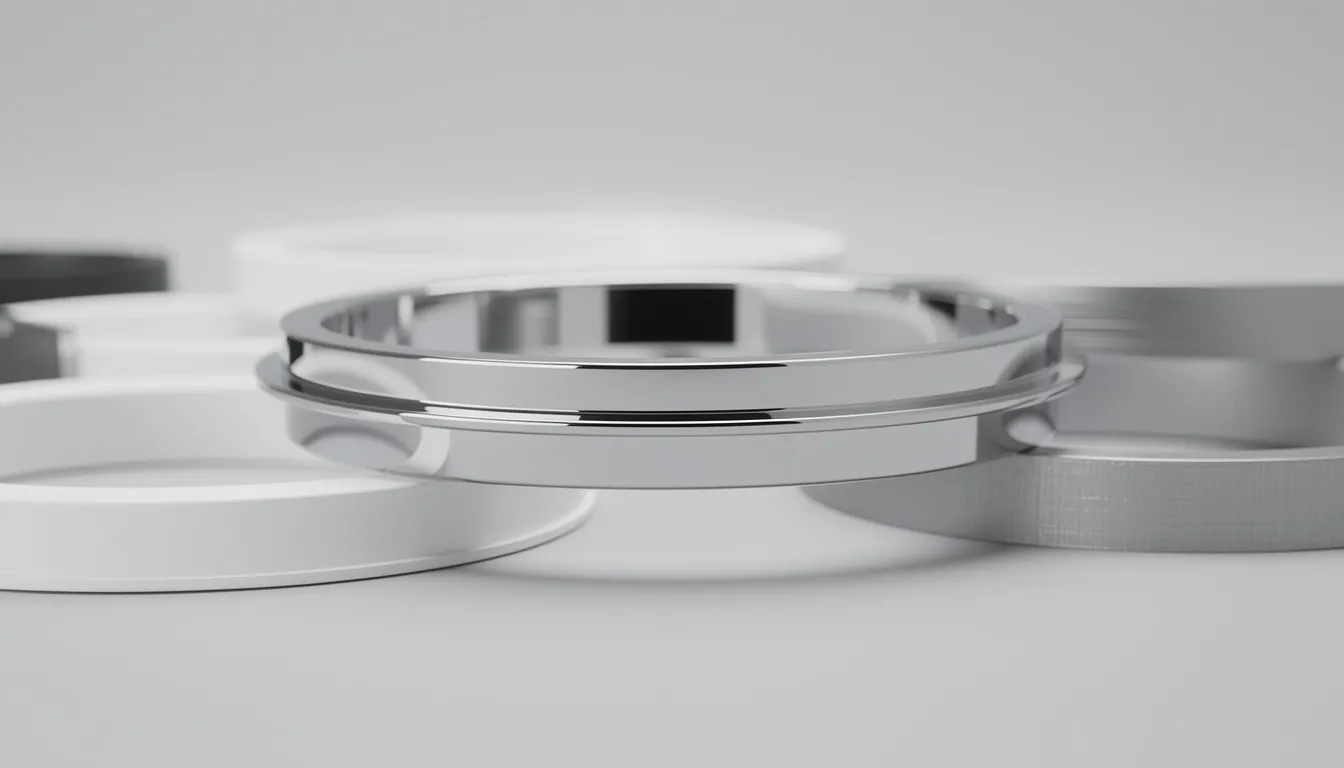
Bezel/trim: The visible frame that sits flush with the ceiling, available in finishes like white, chrome, brushed steel, or black
Light source: Either an integrated LED module or a replaceable lamp such as a GU10
Reflector: Directs the light downward and influences beam angle
Diffuser: Optional lens that spreads light more evenly and reduces harsh shadows
Driver: The electronic component that powers LED modules (built into integrated downlights or separate for lamp-based types)
The beam angle determines how the light spreads. A narrow beam of around 30-40° creates focused, intense illumination ideal for highlighting specific areas, while a wider beam of 60° or more provides softer, more even coverage for general lighting.
Both downlights and spotlights are ceiling-mounted fixtures, but they serve different purposes and look quite different once installed. Understanding this distinction helps you choose the right option for each room.
Recessed downlights sit flush with the ceiling and normally point straight down. Even adjustable models typically offer only 20-40° of tilt. Spotlights, by contrast, are usually surface mounted on a base or track and can be swivelled almost 360° horizontally with significant vertical adjustment too.
Key differences at a glance:
Installation: Downlights require a cut-out in the ceiling; spotlights usually need only fixing screws and a small cable entry hole
Visibility: Downlights blend into the ceiling; spotlights become a visible design element
Direction: Downlights provide general lighting in a fixed downward direction; spotlights offer greater control for highlighting specific features
Flexibility: Spotlights can be re-aimed regularly; downlights are set during installation
Practical examples in a UK home:
A grid of fixed downlights across a kitchen ceiling for even ambient lighting
Adjustable spotlights on a track above a kitchen island to direct light onto the worktop
Recessed downlights in a hallway for safe, shadow-free circulation
A spotlight bar in a living room angled toward artwork or bookshelves
Downlights are suitable for residential settings, commercial spaces, and selected outdoor applications. With the right IP rating and fire-rated options, they can be installed almost anywhere you need clean, modern illumination.
Typical residential applications:
Kitchens: Over worktops, islands, and dining areas
Living rooms: Providing ambient lighting with optional dimming
Hallways and staircases: Evenly spaced for safe navigation
Bathrooms: IP-rated fittings around showers, baths, and mirrors
Bedrooms: Softer output for relaxed atmospheres
Loft conversions and extensions: Where ceiling height may be limited
Common commercial uses:
Open-plan offices and meeting rooms
Hotel corridors and guest rooms
Retail stores and showrooms
Restaurants and bars
Reception areas and lobbies
Healthcare and education facilities
Outdoor and semi-outdoor locations:
Soffits and eaves
Covered porches and entrances
Canopies and carports
Covered patios (IP65 or higher for exposure to elements)
In many modern UK new-builds and refurbishments, downlights are the default choice because they keep ceilings clean and clutter-free compared with pendant lights or bulky surface fixtures.

H2 Lite CSP CCT integrated LED downlight
The same downlight can serve different lighting roles depending on its position, output, and beam angle. Understanding these functions helps you plan layouts that work for everyday life.
Ambient/general lighting:
A grid of wide-beam downlights can light an entire room evenly, creating comfortable background illumination for open-plan kitchen-diners, living spaces, or bedrooms. This is the most common use of downlights and forms the foundation of most lighting schemes.
Task lighting:
Brighter or narrower-beam fittings positioned over kitchen worktops, bathroom mirrors, desks, or reading corners provide focused light exactly where you need it. Task lighting helps you work safely and comfortably without straining your eyes.
Accent lighting:
Adjustable downlights can highlight artwork, alcoves, feature walls, shelving, and architectural elements. By using a narrow beam and positioning the fitting to “wash” light across a surface, you create visual interest and depth in a room.
Safety and wayfinding:
Downlights in hallways, stairs, and entrances reduce shadows and trip hazards, particularly valuable at night or in windowless spaces. Evenly spaced fittings ensure consistent illumination throughout circulation areas.
There are several ways to categorise downlights: by mounting method (recessed vs surface), adjustability (fixed vs tilt), protection level (fire-rated, IP-rated), and light source type (integrated vs lamp-based).
A single product can sit in multiple categories. For example, you might choose a recessed, fire-rated, IP65, integrated LED downlight for a UK bathroom—covering mounting, safety, water protection, and technology in one fitting.
The subsections below describe each main type, focusing on what they’re best suited for rather than deep technical specifications.
Recessed downlights install into a cut-out in the ceiling so the bezel sits flush or almost flush with the surface. This is the most common style in UK homes because it creates a clean, minimal look and hides the body of the fitting entirely within the ceiling void.
Installation typically involves cutting a circular hole (commonly 70-90mm diameter), connecting the wiring, then clipping the fitting into place using spring clips that grip the ceiling material.
Best applications for recessed downlights:
Living rooms and lounges where aesthetics matter
Kitchens with new plasterboard ceilings
Hallways and circulation spaces
Any room where a seamless ceiling appearance is desired
New-build properties and major renovations with ceiling access
Recessed lights require sufficient depth in the ceiling void—typically 50-100mm minimum depending on the model.
Surface mounted downlights attach directly to the ceiling surface rather than recessing into it. The entire fitting remains visible below the ceiling line.
This approach suits situations where there’s little or no ceiling void—such as concrete ceilings in flats, certain extensions, or rooms where you want to avoid cutting large holes. Surface mounted options can also be a deliberate design choice, with cylindrical or square bodies becoming decorative features in modern interiors.
Advantages of surface mounting:
No need for deep ceiling voids
Simpler future changes (small screw holes easier to fill than large cut-outs)
Can work on concrete, exposed beam, or decorative ceilings
Available in contemporary designs that complement minimalist spaces
Suitable for retrofitting older properties
Fixed downlights point straight down (perpendicular to the ceiling) with no tilt mechanism. They’re typically the most cost effective option and ideal for general lighting where you don’t need to highlight specific features.
Fixed designs often offer better glare control because the LED and reflector can be set deeper into the fitting, shielding the light source from direct view.
Common uses for fixed downlights:
Evenly spaced layouts in hallways and landings
Bedroom ceilings for ambient illumination
Simple kitchen arrangements
Utility rooms and storage areas
Any space requiring consistent, uniform light
Adjustable or gimbal downlights allow the light source to be tilted, typically by 20-40°, directing light toward walls or objects rather than straight down.
They install like standard recessed downlights but offer additional control. This makes them useful for wall-washing effects, picking out kitchen splashbacks, highlighting artwork, or avoiding glare on TV screens and glass-fronted kitchen cabinets.
Ideal applications for adjustable downlights:
Feature walls and architectural details
Above artwork and display shelving
Kitchen areas where worktops need targeted illumination
Rooms with sloped ceilings where fixed fittings would miss their mark
Media rooms where you want to direct light away from screens
Planning is still important—these aren’t designed for constant re-aiming like theatrical lighting.
IP ratings use a two-digit code describing protection against dust and water. This matters significantly in bathrooms, kitchens, and outdoor spaces where moisture could damage electrical components or create safety hazards.
Common IP ratings for downlights:
|
Rating |
Protection Level |
Typical Use |
|---|---|---|
|
IP20 |
Basic protection against solid objects |
Dry rooms: bedrooms, living rooms, hallways |
|
IP44 |
Protected against splashing water |
Bathroom zones away from direct water, kitchens |
|
IP65 |
Protected against water jets |
Directly above showers, outdoor soffits |
For a UK bathroom refurbishment, you’d typically use IP65 downlights directly above the shower tray and bath, with IP44 suitable for zones further from water sources. Always check building regulations and manufacturer guidelines for the correct ip rating in each zone.

Fire rated downlights restore the fire integrity of the ceiling where a hole has been cut for the fitting. They contain intumescent materials that swell when exposed to heat, sealing the hole to slow fire and smoke spread to rooms above.
In the UK, typical ratings include 30, 60, or 90-minute fire-rated downlights, aligning with common ceiling constructions and building regulation requirements.
Why fire safety matters:
Building regulations often require fire-rated fittings in ceilings forming fire barriers between floors
Essential in flats, HMOs, and properties above commercial premises
Protects escape routes and buys time for evacuation
May be mandatory for building control sign-off on new installations
Fire rated models cost slightly more than standard fittings but provide essential protection that non-rated alternatives cannot match.
Integrated LED downlights have the LED module and driver built in as a single unit. You can’t replace the lamp separately—when the LED eventually fails (typically after 25,000-50,000 hours), you replace the entire fitting.
Lamp-based or non-integrated downlights accept a replaceable lamp such as a GU10 LED bulb. This allows future changes of light colour temperature, output, or technology without replacing the whole fitting.
Integrated downlights are ideal when:
You want the slimmest possible profile for shallow ceiling voids
Consistency across all fittings matters (same colour temperature throughout)
You prefer a cleaner, more streamlined design
You don’t anticipate needing to change lamp characteristics
Lamp-based downlights suit projects where:
Future flexibility is important (e.g., rental properties where tenants may prefer different warmth)
Lower upfront cost per fitting is a priority
Easy lamp replacement is preferred over replacing entire fixtures
You want to upgrade to newer LED technology as it develops
Many modern LED downlights work with a dimmer switch, but not all—you must check the product specification before purchasing. Using a non-dimmable LED on a dimmer circuit typically causes flickering, buzzing, or premature failure.
Benefits of dimmable downlights:
Adjust brightness for different activities and times of day
Create ambience for entertaining or relaxing
Reduce energy consumption when running below full power
Extend LED lifespan by operating at lower temperatures
Dimmable options work particularly well in living rooms, open-plan spaces, and bedrooms where you might want bright functional light for some tasks and softer illumination for evenings.
Non-dimmable downlights remain perfectly suitable for utility rooms, cupboards, garages, and basic circulation spaces where simple on/off control meets all requirements.
LED downlights have largely replaced halogen alternatives in new installations. Regulations, energy costs, and performance advantages have all driven this shift.
Energy efficiency:
LED downlights typically consume 5-10W compared with 35-50W for equivalent halogen lamps. This translates to substantial reductions in energy bills—often 70-80% less electricity for the same light output. For a kitchen with six downlights running several hours daily, annual savings can be significant.
Long lifespan:
Quality LED modules are rated for 25,000-50,000 hours at L70 (meaning they retain 70% of original output). At typical household use of 3-4 hours per day, that’s potentially 15-25 years before replacement. This dramatically reduces maintenance, particularly valuable in high ceilings or commercial settings where lamp changes are disruptive.
Design and aesthetics:
Modern LED downlights offer slim profiles that suit shallow ceiling voids—some require as little as 30mm depth. Bezel options include white, chrome, brushed steel, black, and trimless designs for ultra-minimal ceilings. This aesthetic appeal complements contemporary architecture and interior design.
Lighting quality:
LED technology delivers excellent colour rendering (CRI 90+ in quality models), wide choice of colour temperatures from warm white (2700K) through cool white (4000K+), and precise beam control. You can select exactly the light colour and spread that suits each application.
Control options:
LED downlights integrate well with dimming systems, smart home controls, and scene-setting arrangements. Many are compatible with wireless protocols for app or voice control, allowing you to adjust brightness and even colour temperature from your phone.
Good planning before cutting any holes is essential. Unlike portable lamps, downlight installation is relatively permanent—moving a fitting later means patching holes and making new cut-outs.
Room function and lighting zones:
Think about how each space will be used. A kitchen might need brighter task lighting over worktops, softer ambient light in the dining area, and accent lighting for display shelving. Planning separate zones with independent switching gives you greater control.
Spacing and layout:
A typical starting point is 1-1.2m between fittings, adjusted based on room size, ceiling height, and individual lumen output. Too few downlights create dark patches; too many can feel harsh and waste energy. Many designers work on roughly one downlight per 1-1.5m² for general lighting.
Ceiling height considerations:
Higher ceilings may require more powerful fittings or tighter spacing to maintain adequate illumination at floor level. Conversely, low ceilings might benefit from lower-output fittings with wider beams to avoid intense beam patterns and uncomfortable glare.
Avoiding obstructions:
Before finalising positions, check for joists, pipes, cables, and HVAC ducts in the ceiling void. Maintaining clearance around fittings where specified by the manufacturer is essential for safety and warranty compliance.
Not all downlights can be covered with insulation. Standard fittings require a clear air gap around the housing to prevent overheating and reduced lifespan.
IC-rated (insulation-compatible) models are designed to work safely when surrounded by thermal insulation, helping maintain the ceiling’s thermal performance. In UK loft-insulated ceilings, installers may need to fit fire hoods or insulation guards around non-IC fittings.
Correct selection protects both fire safety and the energy efficiency of your home—poorly installed downlights can create thermal bridges that undermine expensive insulation.
Beam angle significantly affects how light falls in a room. Narrow beams (30-40°) suit accent lighting and task areas; wide beams (60°+) work better for general coverage.
Practical placement tips:
Position downlights 30-40cm out from kitchen worktops and bathroom vanities to avoid shadows cast by people standing below
For wall-washing effects, place fittings closer to the wall (roughly one-third of ceiling height) and use wider beams
In lounges and media rooms, choose recessed or deep-baffle designs to minimise glare
Avoid placing downlights directly above where people typically sit—the intense illumination directly overhead can feel uncomfortable
While some competent DIYers may feel confident cutting holes and connecting fittings, UK regulations—particularly Part P of the Building Regulations—require that electrical work be either carried out or certified by a qualified person.
When to use a qualified electrician:
Installing new circuits or extending existing ones
Any work in bathrooms, kitchens, or outdoor spaces
Properties with older wiring that may need upgrading
When unsure about cable sizing, protection devices, or testing requirements
Fire-rated installations that require certification for building control
DIY installation typically involves isolating the power, cutting accurate ceiling holes, wiring junction boxes or plug-and-play connectors, and securing fittings according to manufacturer instructions. However, mistakes can create fire hazards, void warranties, and cause problems when selling your property.
Before any downlight installation, check fire rating, ip rating, and insulation requirements. It’s far easier to select the correct fittings beforehand than to discover problems after holes have been cut.
The “best” downlight depends on room type, ceiling construction, desired appearance, and budget. There’s no single answer—but asking the right questions helps narrow your options quickly.
Light output (lumens):
Modern LED specifications list lumens rather than watts. For many domestic rooms, 400-600 lumens per fitting works well with typical spacing. Kitchens and workspaces might benefit from 600-800 lumens per downlight, while bedrooms and lounges might use lower outputs for softer ambience.
Colour temperature:
|
Colour Temperature |
Description |
Typical Use |
|---|---|---|
|
2700K |
Warm white |
Living rooms, bedrooms, restaurants |
|
3000K |
Warm/neutral |
Kitchens, bathrooms, general domestic |
|
4000K |
Cool white |
Offices, retail, task areas |
|
5000K+ |
Daylight |
Commercial, industrial, some bathrooms |
Beam angle selection:
25-40°: Narrow beam for accent lighting, highlighting artwork, and specific features
45-60°: Medium beam for versatile lighting in most residential settings
60°+: Wide beam for ambient lighting and areas with lower ceilings
Finish and style:
Match bezel finishes to other hardware in the room—door handles, switch plates, kitchen cabinet handles. Popular options include white (blends with most ceilings), chrome, satin nickel, brushed steel, and matt black. For high-end projects, trimless recessed fittings virtually disappear into the ceiling.
Future flexibility:
Consider whether dimmability matters, whether you’d prefer replaceable lamps versus integrated modules, and whether the chosen fittings work with existing wiring and any smart home systems you might add later.
Downlights offer a clean, modern approach to illuminating virtually any space. Whether you’re upgrading a single room or planning a complete renovation, understanding the fundamentals—mounting types, IP and fire ratings, beam angles, and output levels—puts you in control of your lighting design.
For new installations and any work involving circuits, bathrooms, or fire-rated ceilings, working with a qualified electrician ensures compliance with regulations and peace of mind. Take time to plan your layout, consider how each room will be used, and select fittings that balance performance, aesthetics, and budget.
With thoughtful planning and the right products, downlights can transform ordinary spaces into beautifully lit modern interiors that work perfectly for everyday life.