403 Forbidden
ERR_WEB_NGX_403

LED strip tape can be cut and customised to fit your specific needs. However, it’s crucial to cut them correctly at designated points to avoid damaging the strips. This article will guide you through understanding if your LED strip can you cut LED strips, the correct way to cut them, and safe practices to follow.

LED strip lights are composed of numerous diminutive LED chips affixed to a slender, flexible circuit board with an adhesive backing. Designed for versatility, these light strips feature tightly spaced LEDs positioned at intervals of just a few millimeters apart, creating an unbroken and smooth line of illumination ideal for achieving consistent lighting along different surfaces.
Installing LED strip lights is remarkably straightforward due to their self-adhesive backing that allows them to be securely fastened onto various surfaces including walls, ceilings or furniture without much effort. The strength of the 3M adhesive ensures longevity in placement, providing simple installation processes. The brightness levels can be customised through compatible dimmers or controllers which give you control over the ambiance by tailoring light intensity according to your preference.
The operation of LED strips requires either a 12V or 24V DC power supply which converts mains voltage into low voltage. This entails using an appropriate power adapter (LED driver) that safely converts standard household electrical currents into low voltage suitable for powering the light strips. Opting for LED strips with higher LED chip densities minimises any occurrence of bright spots and shadow areas ensuring even distribution across its length. Grasping these fundamental aspects will support better decision-making when engaging in projects involving LED lighting installations.
Yes, LED strips can be cut and customised, its a versatile option for those looking to tailor their lighting solutions. Fortunately, these LED strips are typically designed to be cut down to your required size. It’s crucial, though, to verify that the specific model you have supports this feature and is constructed accordingly.
On most of these strip lights, there are predetermined cutting points indicated by either a line or an icon resembling scissors. These guides ensure cuts can be made without interfering with electrical pathways since they’re strategically located between copper dots on the LED strip. Making incisions at these designated markers allows the rest of the LED strip light segments to remain operational while maintaining both circuitry and LEDs’ functionality.

Adhering strictly to these instructions when modifying your cut LED light strips is vital because any deviation from them may result in an unusable product. By mistakenly severing sections beyond those predefined spaces, you could compromise internal components causing certain parts not to illuminate. Thus grasping where and how appropriate cuts should be executed stands as an essential preliminary step towards custom fitting your LED strip lights into any desired location.
The task of cutting LED strip lights can seem intimidating, but executing a few straightforward procedures ensures both a neat and operational cut. It is imperative to only slice at the marked points on the strip to avoid inflicting damage. One must undertake certain safety measures, accurately locate the appropriate points for cutting, and then carry out the cut with precision.
Following these prescribed steps will allow you to adapt your LED strip lights safely for an array of uses.
Prioritise your safety before commencing the cutting process. Ensure that you have disconnected the power supply from the LED strips to mitigate any chance of electrical shock or ruining your strip lights. This fundamental step is paramount for safeguarding both yourself and the longevity of your led strips.
A sharp pair of scissors or electrical cutters will be immensely useful during this procedure. Utilise only well-maintained and keen-edged scissors, as blunt instruments can cause jagged edges and potential damage to your LED strip. Refrain from employing overly aggressive tools like box cutters, which may lack the finesse required for a neat trim.
Adhering to these cautionary measures ensures that you are fully equipped to commence trimming down your LED strip lights in a secure manner.
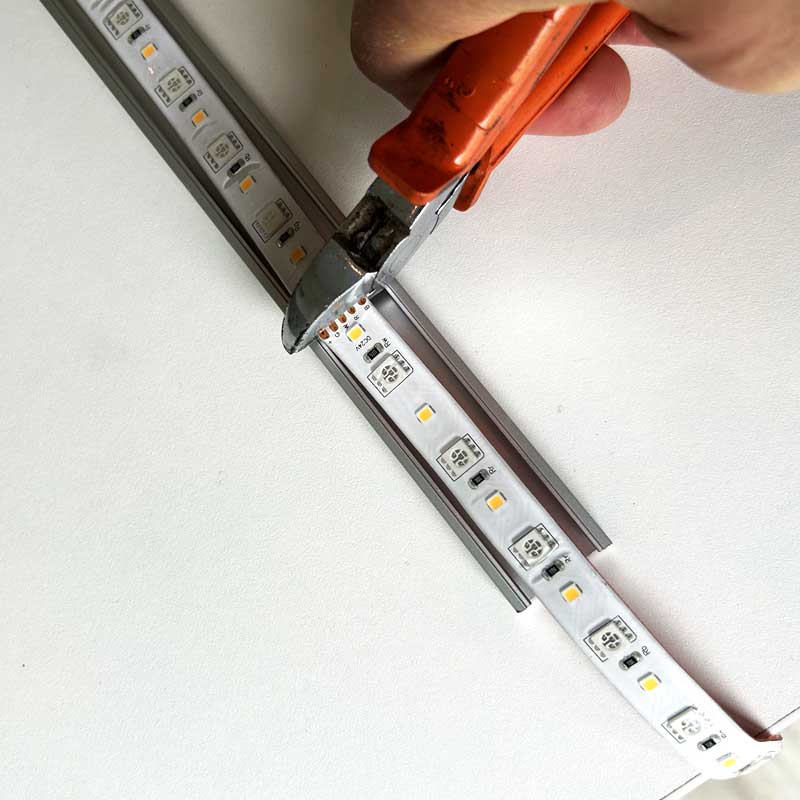
It is essential to locate the designated cut point on your LED strip accurately, which will enable the strip’s continued operation post-cutting. Manufacturers typically indicate these points with dashed lines and an icon of scissors, providing clear indicators for where it is safe to cut. The cutting point distances varies depending on the version you're installing, popular cut point intervals are 50mm and 100mm, some more specialised strips are further apart and some new strips can be cut anywhere.
Single colour strips such as warm white and cool white etc has two solder points, RGB colour changing strips has four and RGBW colour changing with white has five solder points. There are also strips with six solder points known as RGB+CCT, which is colour changing and colour temperature adjustable in one.
To preserve the integrity of your LED strip, take care not to harm the solder pads located close to these cutting areas. Cutting beyond these specified marks can interrupt the electrical pathway and potentially render segments of your strip non-operational. It also makes it more difficult to solder a new connecting cable onto a smaller soldering section.
By adhering strictly to these guides when cutting, you ensure that each slice through the LED strip maintains both its neat appearance and full functionality.

Once you have trimmed your LED strip lights to the desired length, the subsequent phase involves re-establishing their connection. When connecting the strips, ensure you match the polarity by aligning the black and red wire correctly; the black wire should connect to the negative terminal and the red wire to the positive terminal. To connect LED strip lights, you can employ various techniques such as using quick, solderless connectors or engaging in soldering. The selection of method will typically hinge on personal preference and the unique demands of your endeavor, with each approach offering distinct benefits.

Utilising connectors offers a straightforward method to join LED strip lights once you’ve reassembled cut LED strips. These come as either quick connectors or clip-on variants such as the hippo design show above, allowing you to connect the strips without soldering. It’s crucial to select a connector that matches the width and type of your LED strip - for instance, pairing a 10mm wide strip with a 10mm connector. There are different connectors available for COB (Chip on Board) LED strips shown below.

When using solder-free connectors, ensure you match the polarity of the black and red wire by aligning the black wire with the negative terminal and the red wire with the positive terminal to ensure proper functionality.
To ensure successful connectivity when applying these connectors, it’s important for the copper contact pads or wires from the led strip to properly touch the pins within the connector. Pay close attention so that you align and orient your led strips correctly. This will help avoid any improper connections. Properly executing these steps with your connectors is key in establishing durable and efficient functionality for connecting cut portions of LED light strips.
For individuals proficient in soldering, this technique offers a more stable and enduring bond. It’s crucial to keep the soldering iron away from any flammable materials during use and remember to disconnect it once you’re done.
When soldering, it is important to match the polarity of the black and red wire by aligning the black wire with the negative terminal and the red wire with the positive terminal to ensure proper functionality. Colour changing strips require more precision and a steady hand.
The process of soldering involves joining the copper dots present on LED strips to preserve the electrical flow. Although this approach demands meticulousness and attention, it provides a reliable fix for piecing together severed LED strips.
It’s imperative to conduct a thorough check of the LED strips by powering them on after they have been reconnected. Make sure to check the polarity of the black and red wire, aligning the black wire with the negative terminal and the red wire with the positive terminal. Look for any segments of the strip that fail to illuminate. Should you encounter any problems, revisit your connections and verify that the polarity is accurate.
By carrying out these tests, you guarantee that your LED light strips are operating correctly prior to completing their installation.
To install LED strip lights, follow this step-by-step guidance to set them up effectively. Once you’ve trimmed and linked your LED strips, the next step is to set them up. Begin by preparing the area where you plan to install the strips, making sure it’s clean and moisture-free for optimal adhesion of the strip’s sticky backing. A smooth surface is best because textures might cause issues with adhesive durability over time.
Kick off your installation by removing a small portion of protective backing from one end of an LED strip and firmly fix it onto your chosen spot. Progressively affix more of the strip along its entire length, paying extra attention when securing corners and connections so that they adhere well. Should you encounter any trouble with sticking, employ alternatives like double-sided foam tape or use an aluminium profile rail for additional reinforcement.

An aluminium profile rail will make your installation look more professional, dissipates heat and diffuses the light for a more even and dot-free lighting array.
Ensuring your LED strips function correctly and have a long lifespan necessitates selecting the appropriate power supply, especially for those tailored to specific lengths. To ascertain the required wattage of the power source, multiply the strip’s wattage per meter by its overall length. For example 2 metres of 15 watt per metre LED strip tape would require a 30 watt power supply.
This computation is vital in picking out a power supply that aligns with your LED strips’ voltage needs while providing stable electricity flow, thus preventing potential dimming or overheating issues. You'll usually need a constant voltage LED driver to power LED strip lights with either a 12V DC or 24V DC output to match the voltage requirement of the strips.
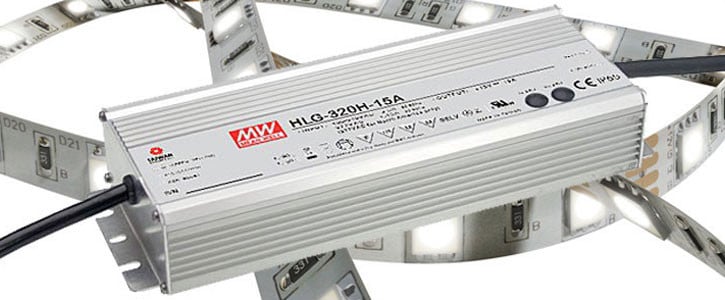
Opting for a power supply with excess wattage capacity is also recommended as it paves way for any additional extensions later on but if you don't plan on adding more strips to your circuit then a 30 watt LED driver can be used with 30 watt strips. The operating environment should also be taken into account when choosing your power supply so that it has sufficient protection from various conditions, if you're installation has a risk of moisture then you should choose an IP65 rated power supply.
Multiple LED strip lights can be connected to a single driver which will be wired in parallel. You can either wire all of the strips directly to the LED driver or you can connect multiple strips together with cables or solder female pins which plug into male to male pins, which can be used with plug-in coupling cables or flat L shape connectors.


By being aware of how much energy each metre of an LED strip consumes and pairing it up with a compatible specification-based power source, you can guarantee efficient and safe operation of your LED lighting system.
Creative Uses for Custom LED Strips
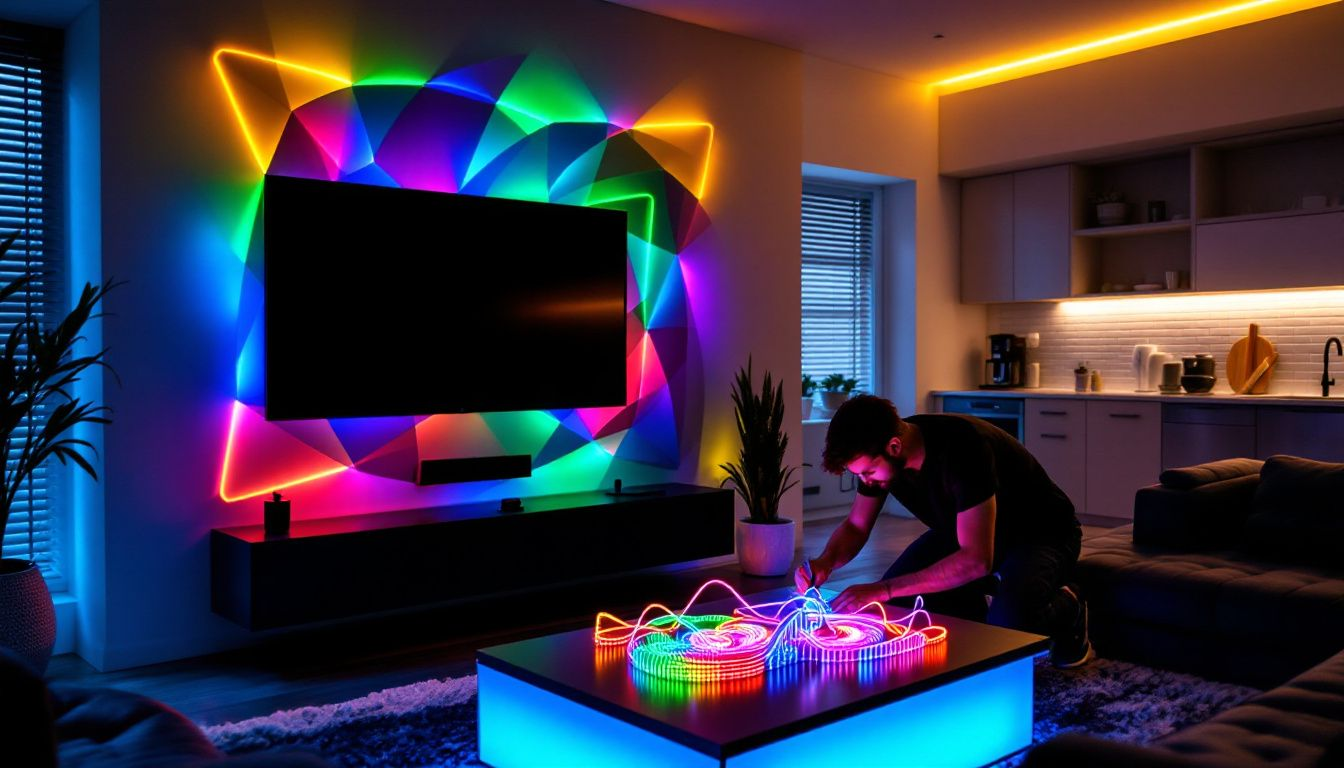
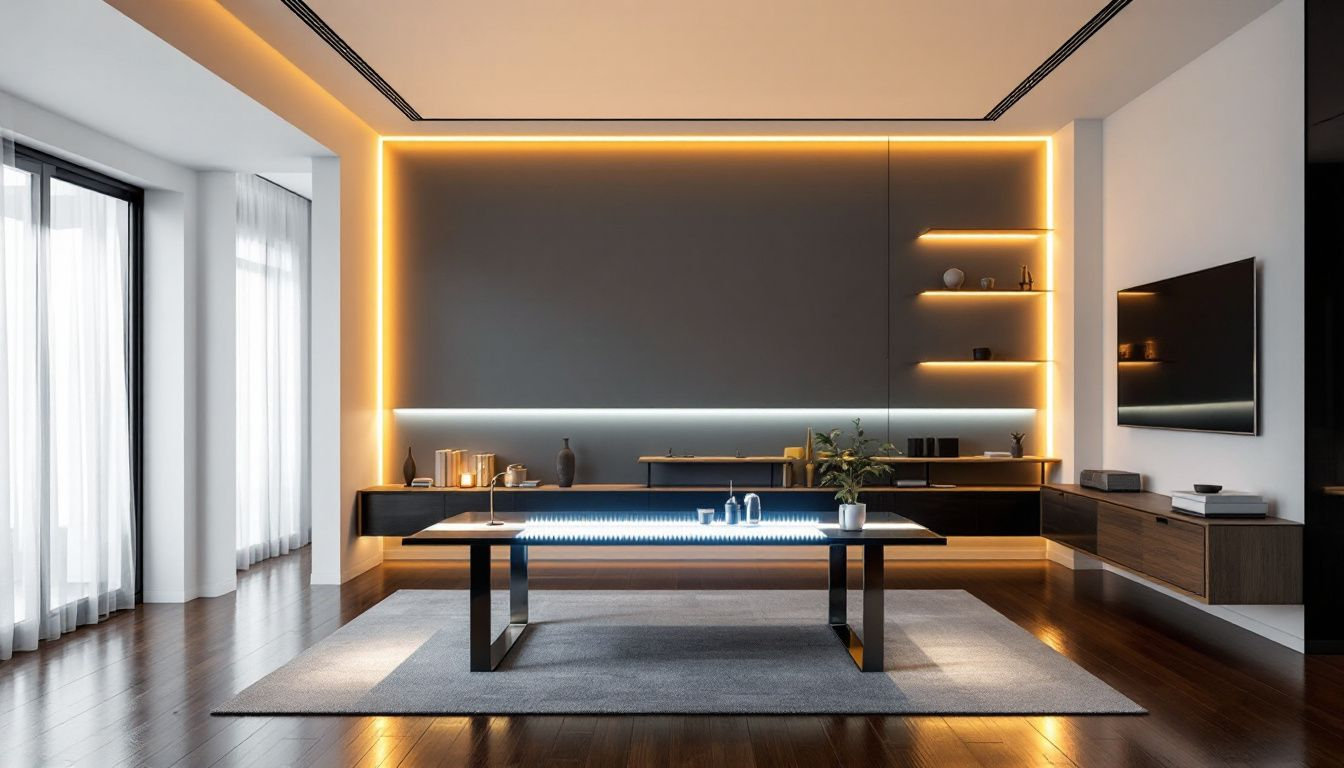
LED strip lighting offers a myriad of inventive opportunities. For instance, affixing an LED light strip to the back of a TV can generate an ambient glow that makes it stand out as the centerpiece in your living room. Or positioning LED strips beneath media stands not only improves your cinematic experience with dynamic color changes, but also augments the overall atmosphere.
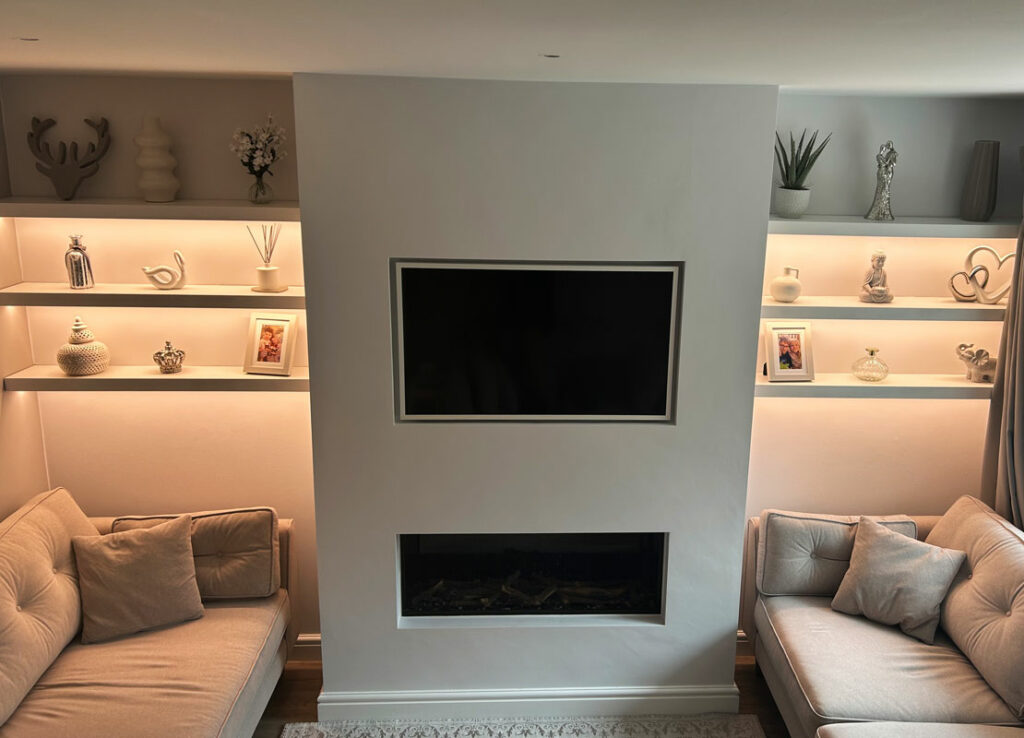
In living spaces, applying LED strip lights to showcase shelving can throw emphasis on prized possessions and contribute significantly to visual interest. The strategic placement of these lights around distinctive architectural elements or pieces of art has the power to turn a simple gallery wall into an extraordinary focal point while providing mood-enhancing illumination—these utilisations serve both decorative purposes and accentuate key features within home interiors.
The use outside is equally transformative for exterior environments where integrating backlighting through LED strip lights behind outdoor bars invites warmth ideal for hosting social gatherings. Employing this type of strip-lighting throughout gardens or patios uplifts their evening allure by spotlighting specific accents, thereby converting any external space into an inviting haven.
Beyond simply elevating decor, functional aspects are inherent in using these versatile LEDs: fitting them inside cabinets allows items stored within easier access because they’re better lit. Situating them within bathroom settings replicates serene spa vibes which contributes extra relaxation during baths. If you're installing LED strips in bathrooms they have a minimum IP (Ingress Protection) rating of IP65 and IP68 rated strips are better for outdoors.

Cutting and customising LED strip lights is a straightforward process when you follow the proper steps. From understanding the basics of LED strip lights to making precise cuts and ensuring secure connections, each part of the process is crucial for achieving the desired results. By adhering to safety precautions, identifying correct cut points, and choosing the right power supply, you can create beautiful and functional lighting solutions for any space.
Whether you’re looking to add mood lighting to your bedroom, highlight architectural features, or enhance outdoor areas, custom LED strips offer endless possibilities. We hope this guide has inspired you to experiment with LED lighting and transform your spaces creatively and safely. We also offer a cutting and soldering service, just complete the form at the bottom of this page and our lighting experts will be in touch.
Not all LED strip lights can be cut; it varies by product. Always check the specifications before ordering and look for designated cut points, usually marked with a line or scissors icon, to ensure proper functionality. Most LED strip tapes can be cut as this is the key selling feature of the product.
If your LED strip lights do not light up after cutting and reconnecting an input cable, it’s essential to check the connections and ensure you have cut them at designated points.
Additionally, verify the polarity and ensure all connections are secure for proper functionality. Then double check that the LED driver is still operational by powering a similar light that is working.
To connect cut LED strips, use quick connectors or soldering techniques, ensuring that the copper pads or wires are properly aligned with the connector pins.
This will ensure a secure and efficient connection.
You need a power supply that matches the voltage of your LED strips and provides a wattage capacity equal to or greater than the total wattage. This is calculated by multiplying the wattage per meter by the strip’s length.
This will ensure optimal performance and allow for potential future expansion.
You can creatively use custom LED strips to establish mood lighting, accentuate architectural details, enhance your outdoor ambiance, and add functional illumination in areas like kitchen cabinet lights and bathrooms.
This versatile lighting option can transform various spaces in your home effectively.


