Installing Fixed & Adjustable iCages In A Kitchen
Name: Mark P
Products Used:
- iCage Fire Rated Downlight Fixed Position
- iCage Fire Rated Adjustable Downlight
- Trailing Edge Dimmer Switch, 3 Gang 2-Way 3 x 300W
Lighting For a New House
I moved into a new house which the builder was charging around £1,000 to install 8 downlights into my kitchen/dining room. This seemed way too expensive so I decided to carry the work out myself once I moved into the property (before carpets etc were fitted upstairs so that the floor could be lifted to install the wiring).
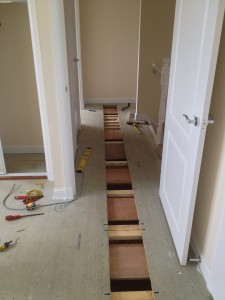
First task was to draw a plan of the ceiling and decide on the number and layout of fittings. To help visualize this in real life I placed ‘post it’ notes on the ceiling where the lights would be. Then I proceeded to cut a track on the floor upstairs above the room using a circular saw running in the opposite direction to the floor joists. This also allowed me to see if there were any obstructions such as joists or pipework which would affect the positioning of the downlights.
How Many Downlights?
I had originally intended to install 15 lights 3 x rows of 5 in the room but due to the spacing of some the joists I could not work that quantity into the ceiling as every second fitting would land directly on a joist. So I increased the quantity 3 x rows of 6 which meant that I could keep my intended uniform layout but this time each fitting landed in the centre of a bay.
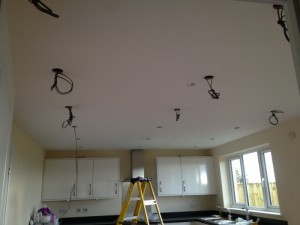
Next I cut each hole out using a battery drill and hole saw sized as per instructions and wired the fittings back to the light switch location.
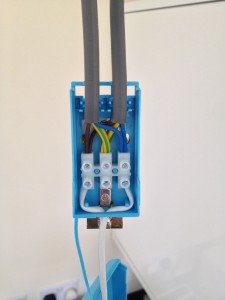
Fitting the lights was very simple, the terminal box is quite small but if the wires are prepared correctly before termination and go in fairly easily. The springs that hold the fitting in the ceiling are not the strongest I’ve ever seen so you have to make sure that the cables are laid into the ceiling carefully so to avoid any weight on the fitting as it is prone to make the fitting fall away from the ceiling slightly.
Once they were all installed I fitted the dimmer switch and commissioned each switch as per the setup instructions. It involved switching on and off the switch several times to activate the setup and auto calibration of the switch.
Then to lay the floor again I wanted to make certain there would be no issues with squeaky floor boards so between each bay I used some block board to add additional support before refitting the flooring. Perhaps this was overkill but I had the block board lying around really didn’t want to risk having to lift carpets in the future.
Lighting Worth Every Penny
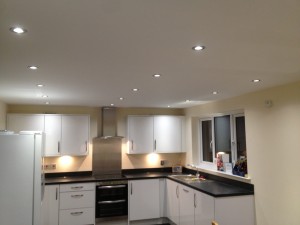
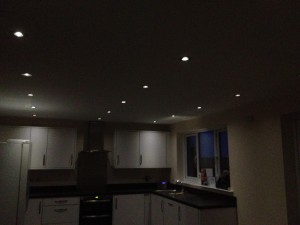
Overall I’m happy with the result and the Phillips lamps although expensive are worth every penny. The brilliant white light from them is stunning and the dimming works flawlessly even to extremely low levels. The photo I uploaded is actually around 30% level as when I dimmed further the photo was too dark. So I fitted 18 quality lights in the room for less than half the price that the house builder was going to charge for a miserly 8, a good days work I reckon!
Problems
I ordered 2 different versions of the Ansell icage fitting, 1 fixed and 1 adjustable. The fixed fittings came with a glass front to the fitting (which the lamp shines through) but the adjustable one didn't. I've read a lot about how the life of lamps can be shortened if the heat from the lamp cannot escape so I was concerned that the glass would restrict the 'breathing' of the lamp as it has holes on the face of the lamp which look like part of the heatsink. I called Downlights Direct technical help and they advised that it is not a problem as the iCage fittings are designed with the open style fitting at the back and would allow heat to dissipate effectively.
Downlights Direct assured me that the life of the lamp would not be reduced, I'm still a bit dubious about this really but with an estimated lifetime of 25 years it will be a long time before I find out who is right.