403 Forbidden
ERR_WEB_NGX_403

Most consumers aren’t aware that you can design & create an LED strip light to your own specifications. You can have any length you want; with any brightness and any colour of light you desire. All you need is a vision, some technical know-how and the right components. My name is Chris, and my project was to build a colour changing LED strip light for my daughter’s bedroom.
I wasn't able to purchase this exact light off the shelf as it doesn’t exist. The exact size, colour and brightness isn’t available from a shop or online store. This meant I either had to go down the bespoke route or make it myself. As I was developing this project on the go, I decided to make it myself with some technical support from the team at Downlights Direct. 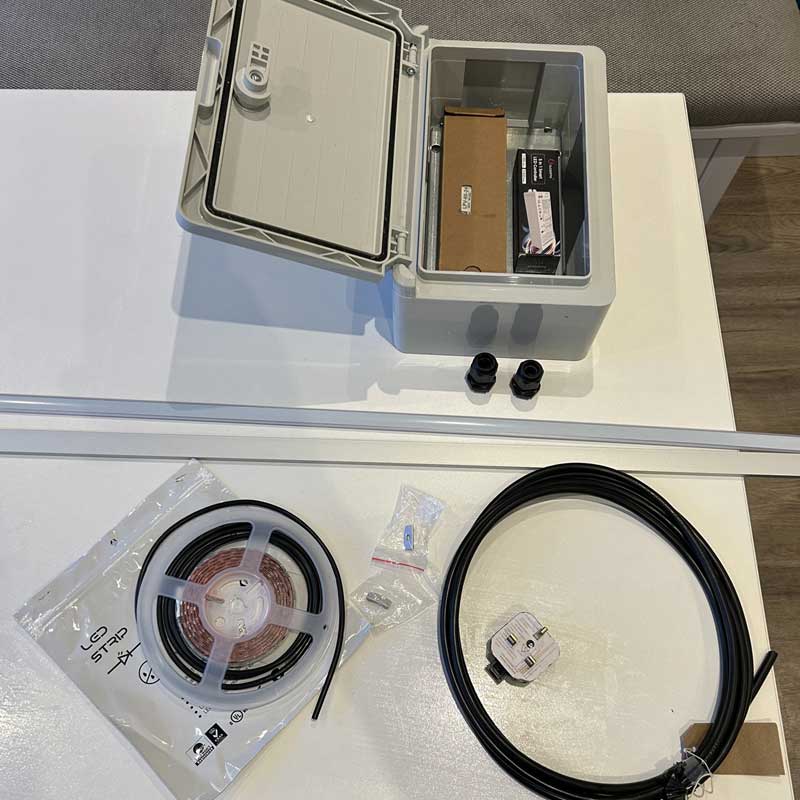
Measure the length of the area where your LED strip light is going to be positioned. In this application we were positioning it under a windowsill. The total length was 1960mm.
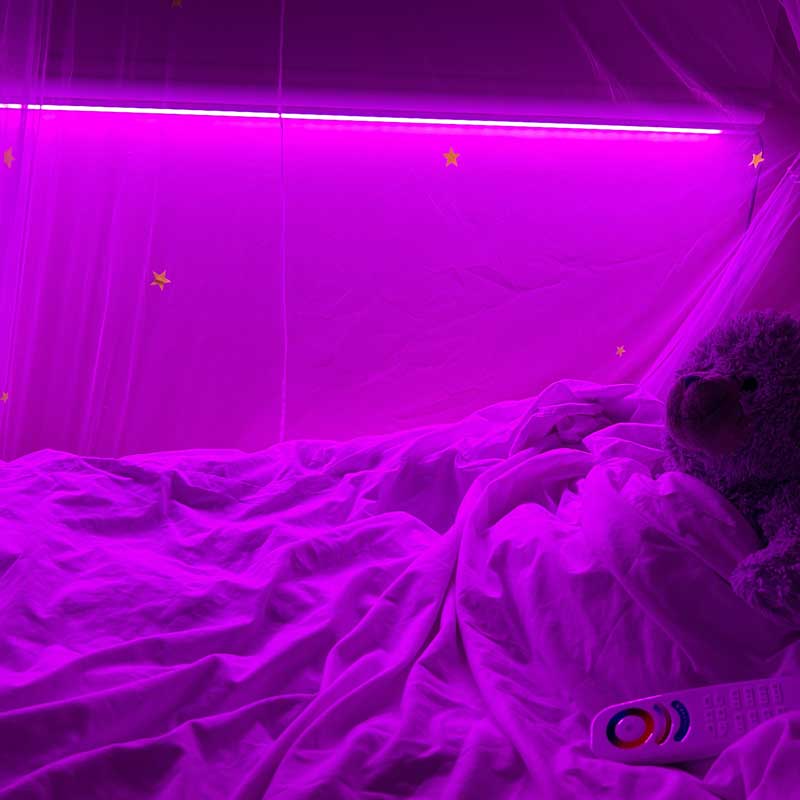
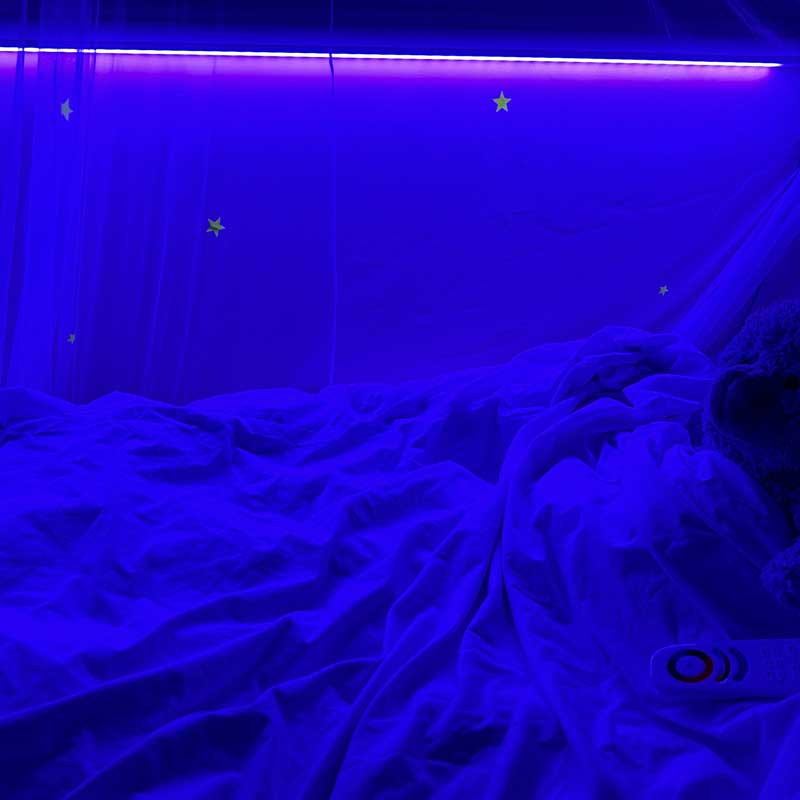
As my daughter wanted a colour changing strip light to; and I quote ‘because they just look cooler’, I also wanted an option of a more relaxing warm white light to help her to get to sleep and to provide a more normal looking, ambient light. The option of RGB+WW (Red, Green, Blue) and warm white 3000K was the perfect choice. It provides the full colour changing effects that she wanted, the warm white that I wanted and the ability to mix colour changing with warm white – which produces some amazing shades of oranges and pinks that you wouldn’t get with ordinary RGB. 
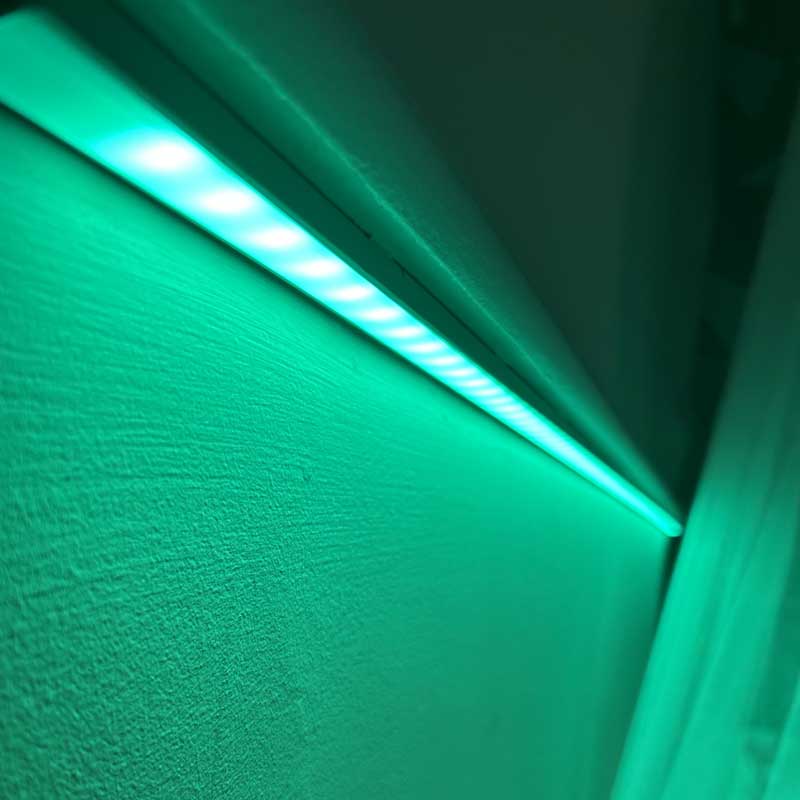
We decided to use a brighter version of RGB+WW LED strip with 96 LEDs per metre, this was physically wider at 14mm, compared with the standard LED strip tapes which are 10mm wide. This meant that we had to order a wider aluminium profile rail for it to fit inside. The wider aluminium profile rail has an internal width of 20mm, which was a perfect fit for the 14mm wide LED strip tape, which is wider because of 2 reasons:
While I could have just stuck the LED strip tape directly onto the surface of the windowsill, on it’s own the LED strip tape is quite fragile and I wanted a more secure and substantial fixing. I wanted to create my own professional, unique light fitting rather than just stick some LED tape onto the windowsill, where it might get messed with or lose its adhesion and start peeling off. 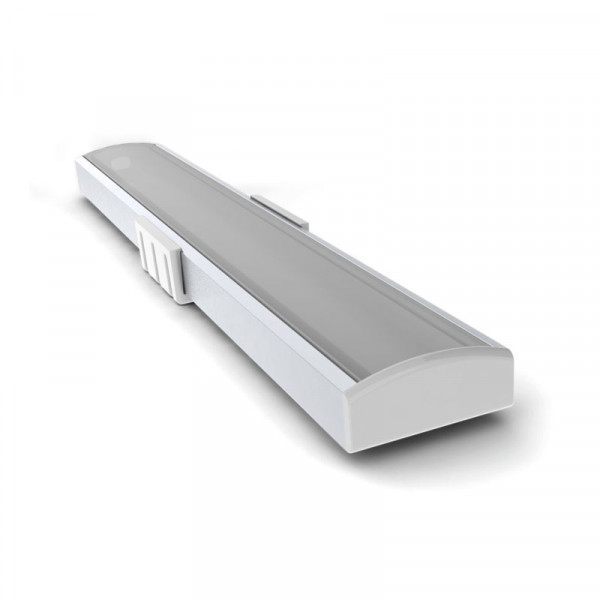 The rail also helps to diffuse the light and reduce any dotting effect from the LED chips. All things considered; the profile rail was an essential requirement and definitely worth the additional cost.
The final measurement of the profile rail was 1960mm which was just short of the 2000mm (2 metre) length that I bought it in. I used a small hacksaw to cut off 40mm from the rail. The LED strip tape has cut points at every 125mm intervals, which meant I had to adapt it to fit inside the rail. I ordered a 2000mm section of LED strip with a 2 metre input cable and cut it down to 1875mm. There were gaps at each side but they’re barely noticeable.
LED strip tapes usually comes with a short 150mm input cable as standard. For this project I wanted a longer 2 metre cable length. As it was RGB+WW LED strip tape, the 5 small wires which would have been difficult to solder, so I got the soldering done from Downlights Direct and they supplied the LED tape with a 2 metre input cable for a modest fee of £3 per solder.
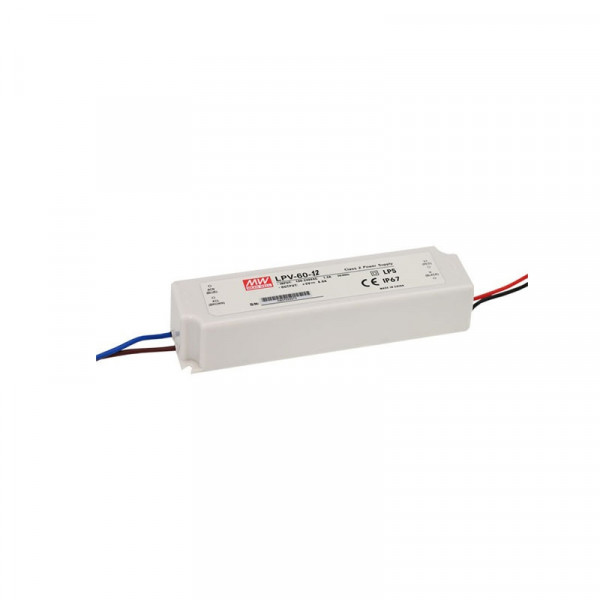
With the final length now decided I could calculate the total wattage and determine which power supply/ LED driver to use. At 23 watts per metre, I multiplied the length by the wattage which was: 1.875M x 23W equalling 43.125W. This meant that I needed an LED driver that was capable of powering 43.125W. As the LED strip tape was 24V, I chose a 60 watt LED driver with a 24V output which was the Mean Well LPV-60-24.
 Lighting Controls
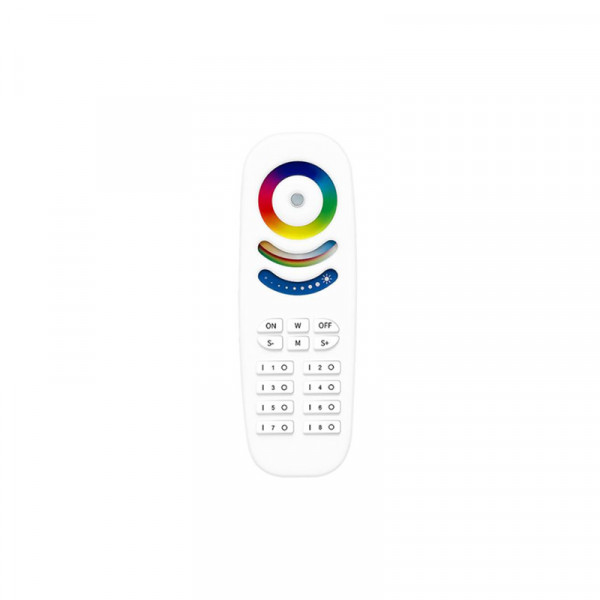
Colour changing lights require controllers to allow you to change the colours. I wanted a handheld remote control that was easy to use as well as smartphone control. I went with the Gledopto GL-C-001P 5 in 1 smart controller which was compatible with the GL-RC-009 remote control. Both myself and 7 year old daughter found this very easy to use. It has a circular dial for changing colours and dials for dimming the warm white of the RGB+WW strip and another dial for dimming. 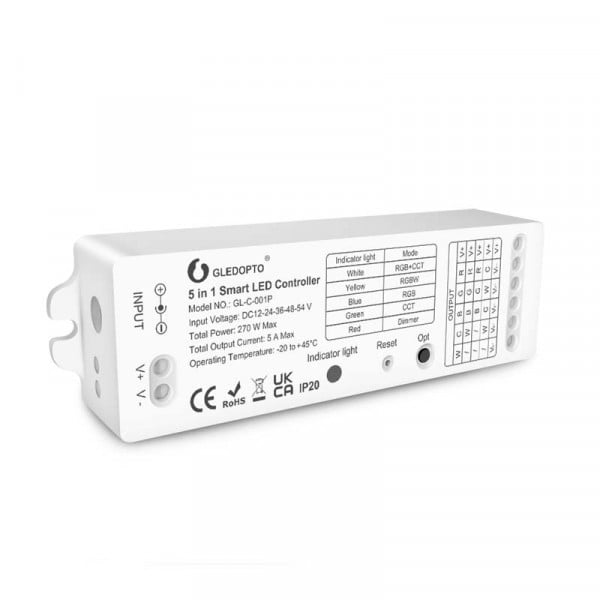
 It's capable of controlling 8 zones, so I could add more receivers or smart bulbs onto the system and control them independently or simultaneously by selecting the zone. You can toggle the zones and change multiple lights to the same setting all at once. The receiver I used did require an additional hub for smartphone control, I went with the Homey hub as its ZigBee compatible and can be used with our smart lighting products. If I’d have already had another hub such as Philips Hue, SmartThings, Amazon Echo or Tuya, I wouldn’t have needed the Homey hub as the smart controller is compatible with other brands. I was very impressed with the Homey hub and set up process, although it did add some additional costs to the project.
 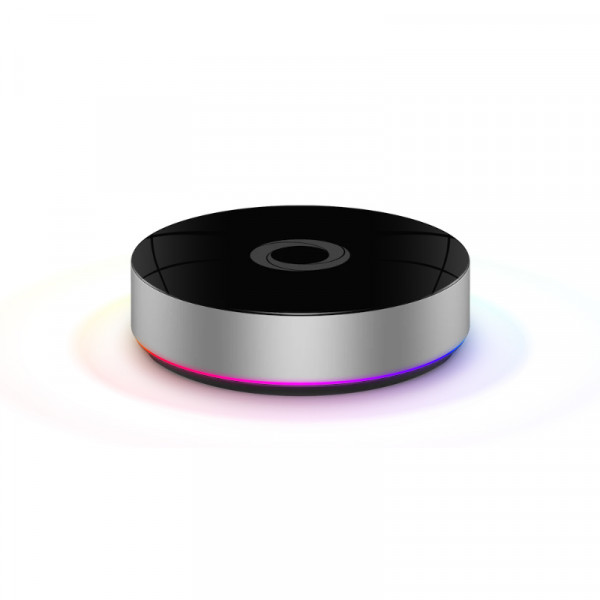 Further Smartphone Controlling with Lightwave My house was already fitted with Lightwave home automation, so I used a Lightwave smart socket to plug the control box into. This gives me the added option of being able to switch it on and off from the Lightwave App. It also lets me monitor energy usage and set timer settings. Lightwave doesn’t have any colour changing control options but combining it with Gledopto worked nicely. I could also use Siri for voice activated controls without needing any other components.
 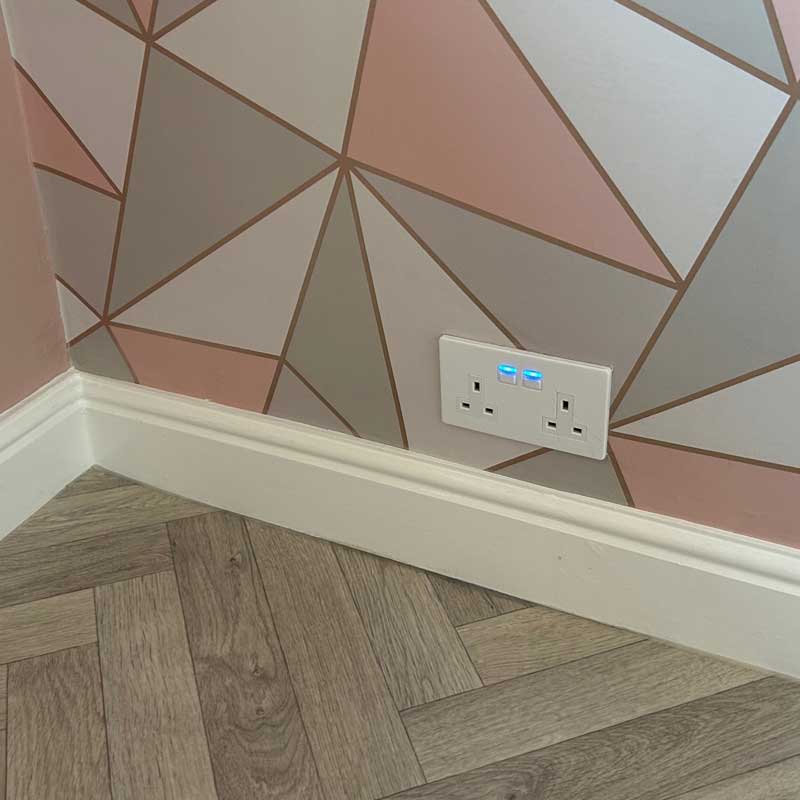 Control Box for LED Driver & Smart Controller Once I’d carefully selected the LED driver and controllers, I needed something to store them inside. They’re delicate electronic components with live terminals, so I used an enclosure. I ordered an ABS (Acrylonitrile Butadiene Styrene) enclosure with a hinged door. It came with a steel mounting plate for mounting the components on. This type of ABS enclosure was perfect for my application, not as heavy or rugged as steel and not as lightweight or flimsy as plastic. The hinged door provides easy access to the internal components.
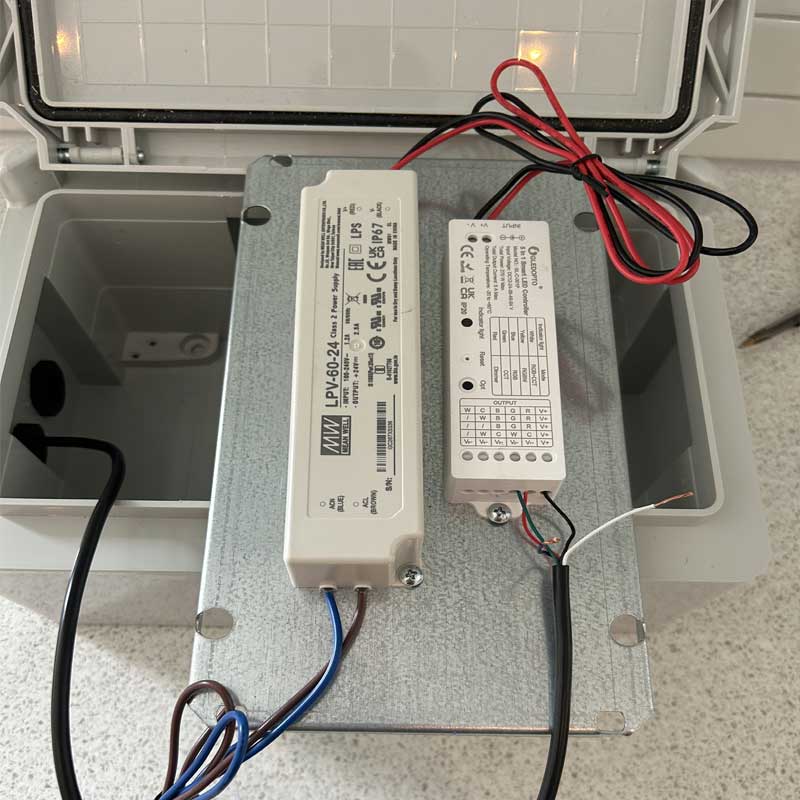
I used the mounting plate as a makeshift workbench by flipping it around during the installation. This made it easier for drilling holes for the screws that held the driver and controller into position.
I placed an end cap without a hole on one side of the rail and positioned the LED strip inside it, adapting it for the 125mm cut points and snipped off the end section of the LED strip. The cut points are easily identifiable by some copper solder points. This did mean I had some small areas without any light at each end. 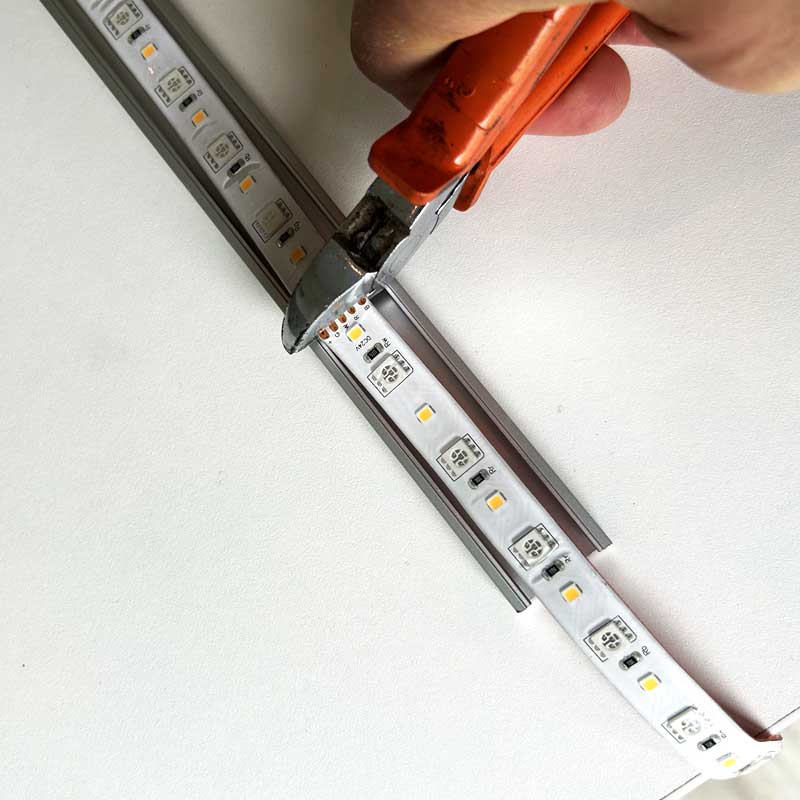 I now had to feed the 5-core cable through a tiny hole on the other end cap with the cable entry. This didn’t quite fit, so I had to enlarge the hole slightly with some precision drilling. I then fed the cable through and positioned the strip into the rail. Then I lined it up within the rail to make it symmetrical at both sides.
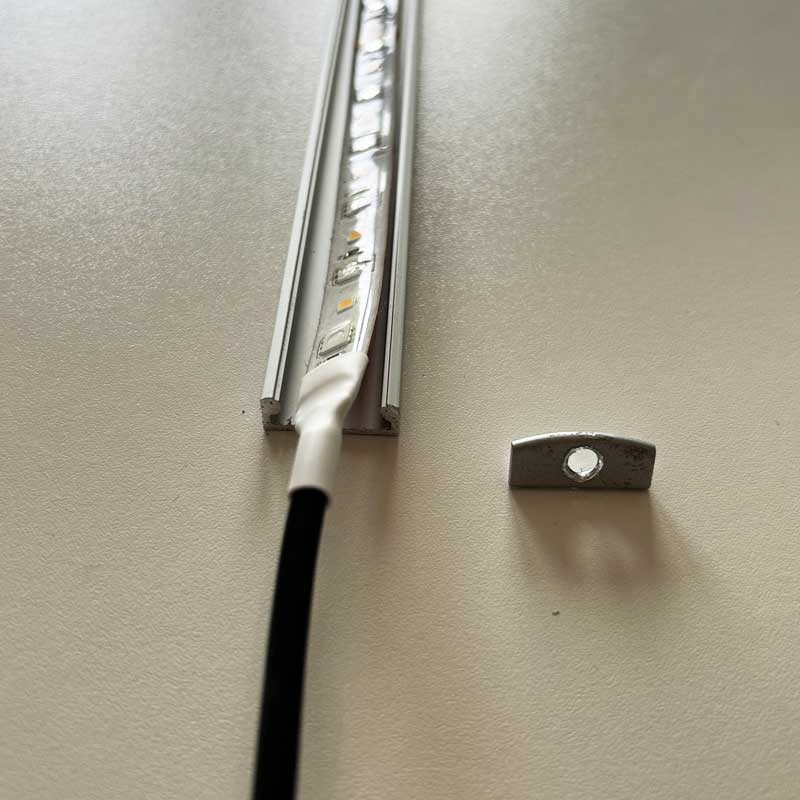
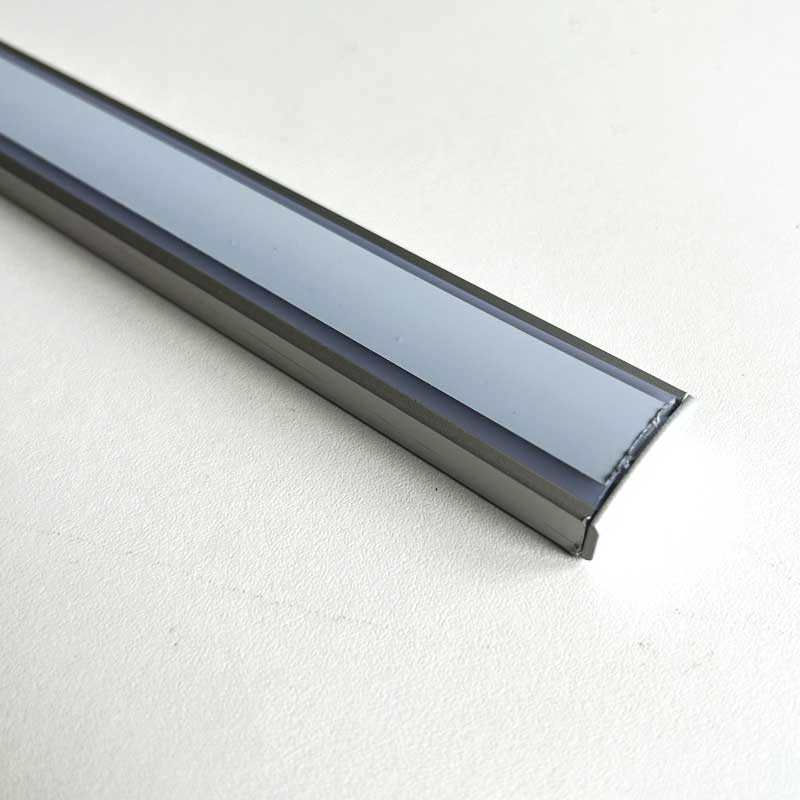
 Once in position, I peeled off the self-adhesive backing and stuck it inside the rail. I did a final measurement of the profile cover and cut it. I then secured the end cap with the cable entry and placed the cover over which clicked firmly into place. I now had my LED rail light ready to connect to the control box.
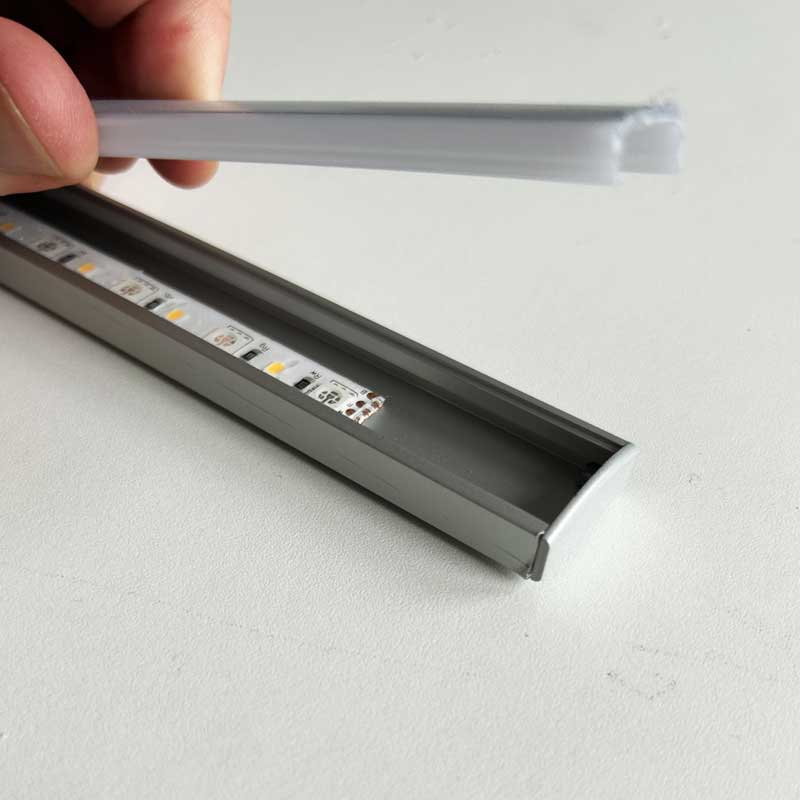
I drilled two 20mm holes for cable glands in the bottom of the ABS enclosure, one was for the mains input cable which was wired into a standard 13A plug top. The other was for the cable entry from the LED strip light. 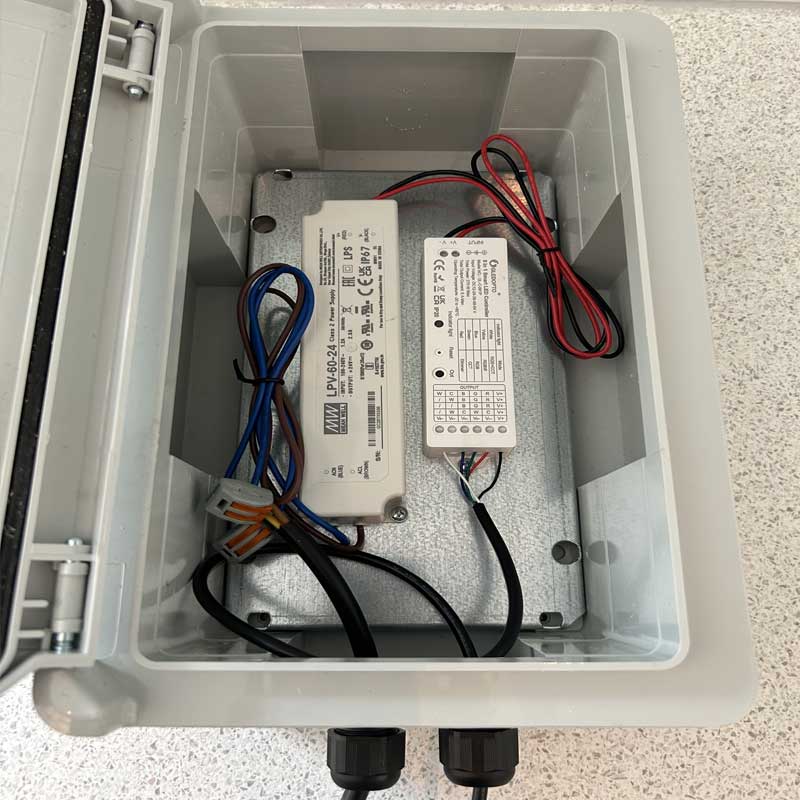 The RGB+WW strip light has 5 very small wires, the push fit terminals on the smart controller were helpful with wiring. I just pressed down the push fit terminals and inserted the fiddly wires, now the LED strip light was connected to the control box. I used some Wago connectors to connect the LED driver to the mains cable. I did a quick test to make sure everything was working, and the new LED strip light turned to a bright, white light.
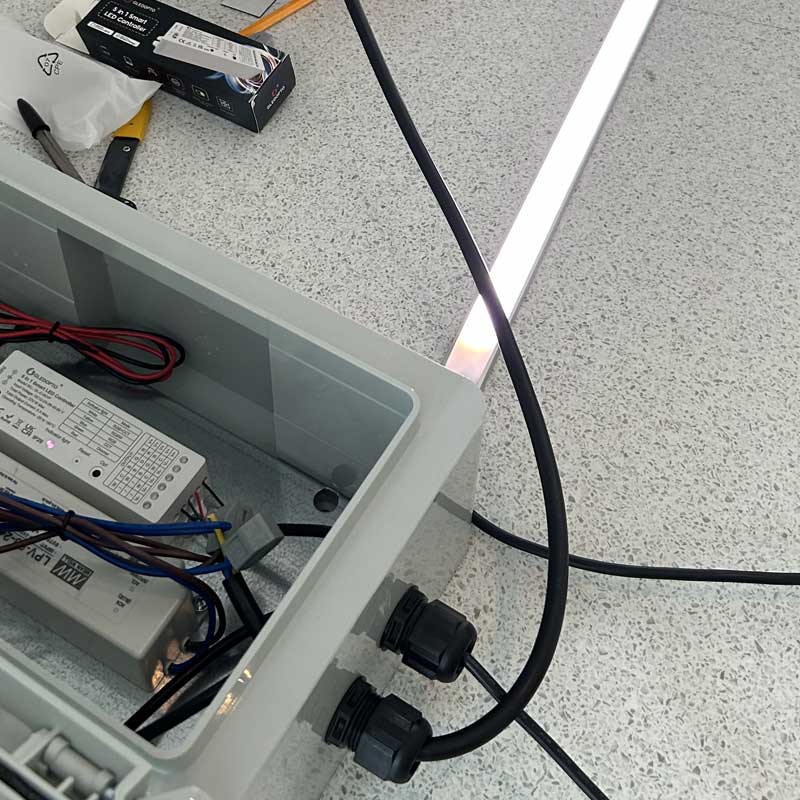
The usual way of mounting an LED profile is to use mounting brackets. I didn’t like the idea of drilling into the windowsill and went with an alternative option, which is foam tape. This double side tape sounded ideal. Although when I did mount it, it required some additional ‘no more nails’ to make it more secure, possibly due the weight of the 1960mm length. 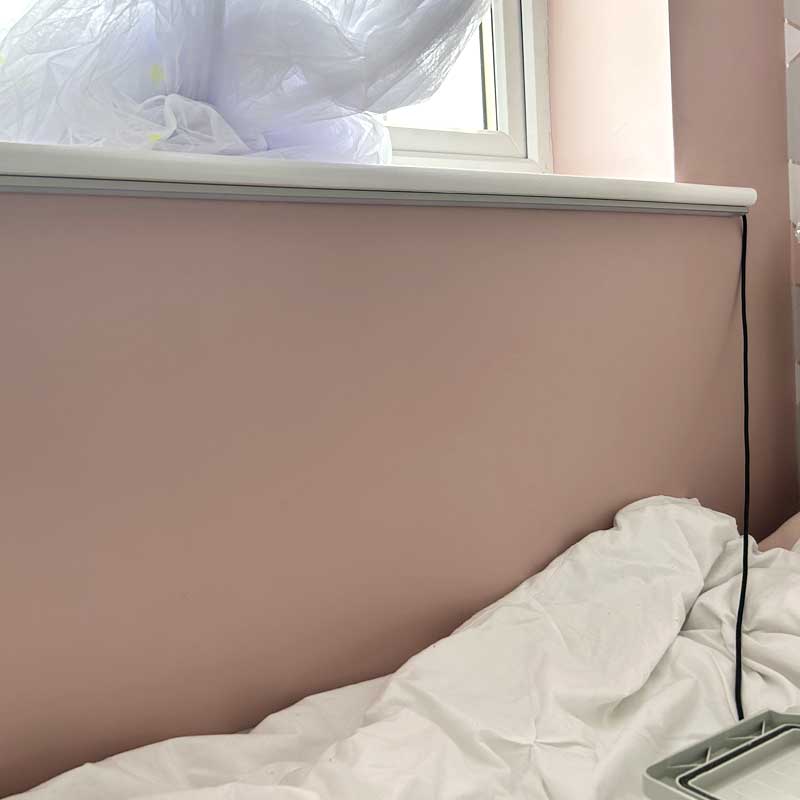 I then placed the control box underneath the bed and plugged it into the smart socket. Then I linked the controller to the Homey bridge and had 3 ways of controlling it.
While there were quite a few points to consider during this project, in the end it was relatively easy to do myself. I created the perfect bedroom light fitting that my daughter had dreamed of. She mainly uses a dimmed warm white setting at evenings and goes to sleep under a dimmed blue light. 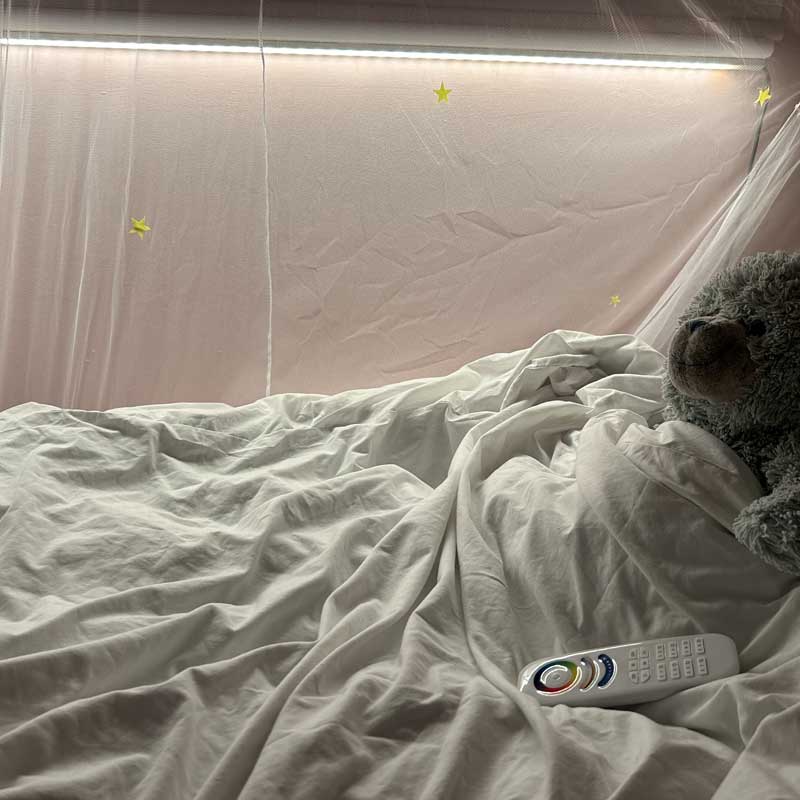
What was the final cost to produce this light?
| SKU | Description | Images | Total Price inc VAT |
|---|---|---|---|
| LEDST96RGBWW/24VN | RGB+WW LED Strip 2M |  |
£37.20 |
| SLW8-1SLW-M1 | Premium Surface Mount Profile Rail for Wider LED Strips 2M |  |
£31.20 |
| FT19/10M | Double Sided Foam Tape 19mm x 5M | 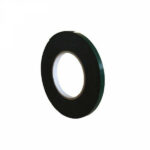 |
£7.98 |
| LPV-60-24 | Mean Well 60W, 24V DC LED Driver | 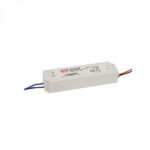 |
£21.76 |
| GL-C-001P | Gledopto ZigBee 5 In 1 LED Smart Controller |  |
£35.80 |
| GL-RC-009 | Gledopto 2.4G Remote Control | 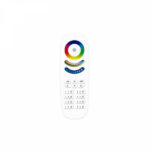 |
£13.91 |
| LEDSTCABRGBW | Cable For LED Strips 5 Core For RGBW Strips | 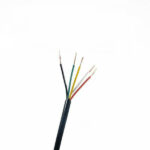 |
£3.82 |
| DED001 | Hylec ABS Enclosures IP65 Rated | 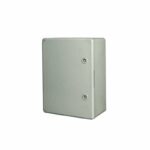 |
£49.10 |
| DT20BK | Cable Glands 20mm |  |
£1.56 |
| 222-412 | Wago 2 Pole Connectors | 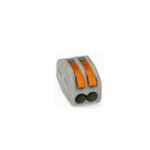 |
£0.60 |
| HOMEY | Homey Bridge ZigBee 3.0 Compatible |  |
£69.00 |
While the final cost would have been £271.93, Downlights Direct did me a project price discount as a deal for sharing my information for this case study. This value didn't include the Lightwave smart socket as I already had that. If I hadn't gone for the smartphone and handheld controlling options, the price would have been around £100 less as I wouldn't have needed the Homey hub and could have used a cheaper smart controller that works with Tuya directly (no hub needed), but I wanted the easy to use handheld remote which was worth paying the extra costs.


